
Learning to use Git and GitHub Actions

GitHub Actions is used to automate developer workflows and streamline collaboration on the GitHub platform. It provides a powerful and flexible framework for automating software development processes and creating Continuous Integration and Continuous Deployment (CI/CD) pipelines.
Recently, I started watching a Udemy course on GitHub Actions and I decided to write a post to summarize what I've learned so far.
In this blog post, we'll explore what GitHub Actions is, how to connect to a remote GitHub repository using Git, and create a sample workflow to print "Hello World" on an Ubuntu environment. We'll also dive into the different components of a workflow and explain how to verify the output in the GitHub Actions tab. Lastly, we'll discuss how to trigger a run for every new "push" event. Let's get started!
What is GitHub Actions and What is it Used For?
GitHub Actions is an automation platform integrated directly into GitHub. It allows developers to define custom workflows using YAML syntax to automate software development processes. These workflows consist of a series of actions, which are individual tasks that can be executed. GitHub Actions can be used for a wide range of purposes, such as building, testing, and deploying applications, sending notifications, creating release artifacts, and much more.
Connecting to a Remote GitHub Repository using Git: To connect to a remote GitHub repository using Git, follow these steps:
Create a new repository on GitHub (if you haven't already).
Open your terminal or command prompt and navigate to the directory where you want to clone the repository.
Run the following command:
git clone <repository_url>Replace
<repository_url>with the URL of your remote repository.Once the repository is cloned, navigate into the project directory:
cd <repository_name>
Committing the Local File with a Sample Workflow: Now, let's create a simple workflow that prints "Hello World" on an Ubuntu environment:
Create a new file named
main.workflowor.github/workflows/main.ymlin the root directory of your repository.Add the following content to the file:
 name: Hello World Workflow

 on:
   push:
     branches:
       - main

 jobs:
   build:
     runs-on: ubuntu-latest

     steps:
       - name: Checkout Repository
         uses: actions/checkout@v2

       - name: Print Hello World
         run: echo "Hello World"
Save the file and commit it to your repository using the following commands:
 git add .
 git commit -m "Add Hello World workflow"
 git push origin main
Understanding the Different Parts of a Workflow: Let's break down the different components of the sample workflow we just created:
name: The name of the workflow.on: Specifies the events that trigger the workflow. In this case, it triggers on every push to themainbranch.jobs: Defines one or more jobs to be executed.runs-on: Specifies the operating system and environment on which the job runs. In this case, it uses the latest version of Ubuntu.steps: Contains a sequence of individual steps that define the actions to be performed. Each step has a name and a run command.
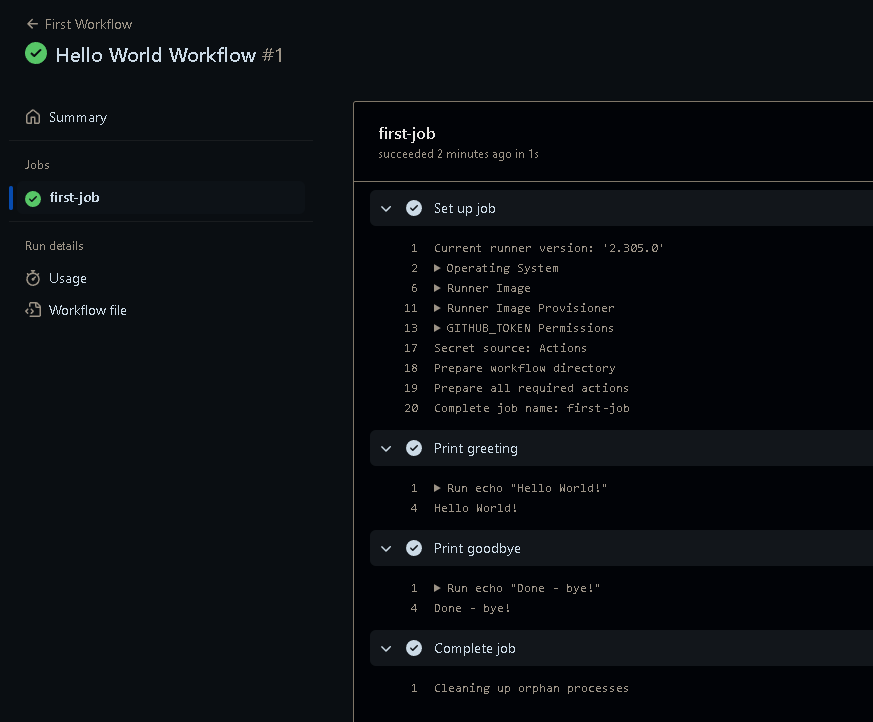
Verifying the Output in the GitHub Actions Tab: To verify the output of the workflow, follow these steps:
Open your repository on GitHub.
Click on the "Actions" tab.
You should see the latest workflow run listed. Click on it to view the details.
In the workflow run details, you can see the individual steps executed, their output, and any errors or warnings that occurred during the run. In our case, it should display "Hello World" as the output of the "Print Hello World" step.
Enabling Trigger for Every New "Push" Event: In the sample workflow we created, the workflow triggers on every push to the main branch. However, if you want to trigger it on every new push event, regardless of the branch, modify the on section of the workflow file as follows:
on:
  push:
In this blog article, I presented an overview of GitHub Actions and demonstrated how you can use it to run a simple workflow on the GitHub platform. It's worth noting that there are many more interesting use cases and I wish to write about how I use them in more complex real-life scenarios.